Wednesday, December 26, 2012

Merry Christmas to everyone

Hello friends.
Merry Chirstmas to everyone. I hope everyone is having a wonderful holiday. Sorry I have been MIA for a while. I've been doing a lot of holiday projects for the family and haven't had time to post any picture. I just want to share one of the project I made for my DH co-worker this year. I decided to make some hot chocolate holders for them. I think it's a cute idea.


I downloaded the cup cutting file from the internet and I used my Pazzles Inspiration Cutter machine.


The top is a tag with the Merry Christmas sentiment and my DH name.


and of course I kept one from my tree. I hope you all like it and if you have any question let me know. Merry Chistmas!!!

Wednesday, November 21, 2012

My husband's 50th Birthday (Part 3)

Hello everyone. Are you ready for Thanksgiving tomorrow? This is one of my favorite time of the year. I can almost smell the Turkey and can't wait to get with the family to celebrate this special day. And after all that food and celebration head over blackfriday sales. Today is the last part of My Husband's 50th Birthday celebration. First I want to show you the decorations for the party. Remember the rosettes I made for his B-day (
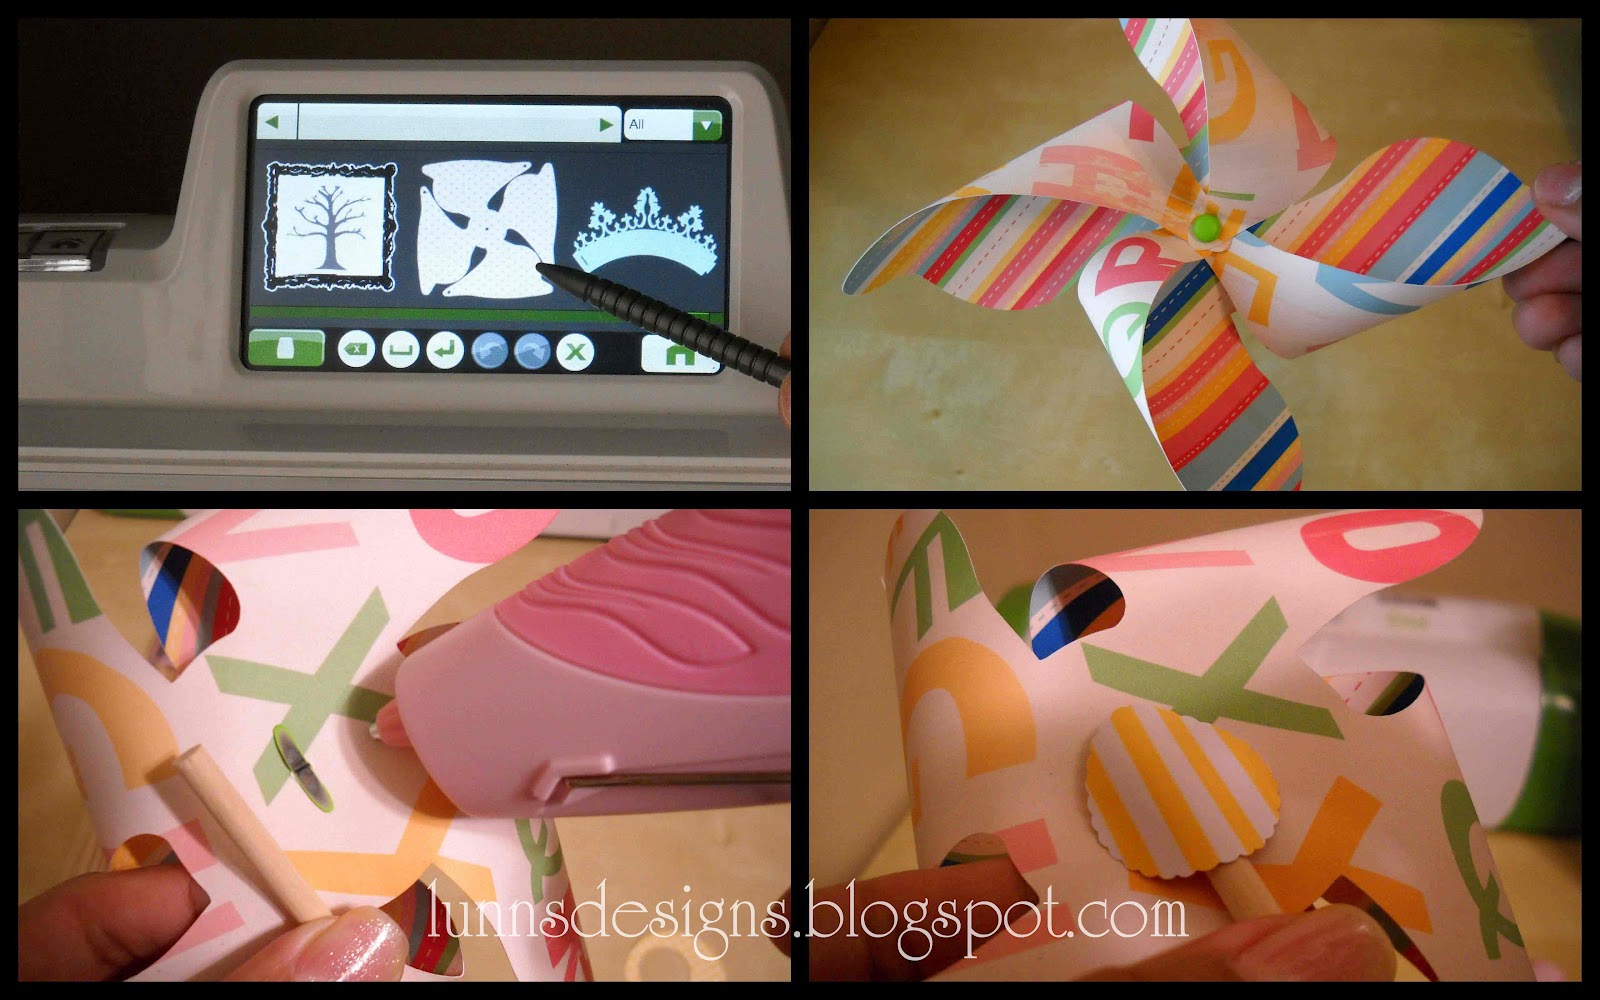
Part 1). I modified them a little bit with 70s cut files. I cut the peace signs using my Pazzles Inspiration Cutting Machine   I love the rosettes for Party decorations.


I also made a Disco Ball PiƱata. It's the first time I made one and I really had fun. It was very hard to hide it from my husband.


And Finally I want to show you the cake. Everybody was taking about the cake. I asked a friend to make the cake with all the 70s colors and I decorated it using my Pazzles. Yes!!! you can also use the Pazzles Machine to decorate cakes, cookies, cupcakes, you name it (you don't need to buy a second machine). You just need a Pastry tool blade or you can also purchase the cake kit.


I decorated it using the same disco people I used for the invitation cards and I cut the letters with a 70s style look. Remember you can cut any letter you want with the Pazzles. I used sugar sheets for the letters and the disco people. I made the disco Ball out of Christmas Ornaments I found in Hobby Lobby.

If you are interested to purchase a  Pazzles Inspiration Creative Cutter I want to tell you a great opportunity to get yours.

As you all know the Pazzles Inspiration is available for $99 with a 2-year agreement to Pazzles Craft Room. But now through Tuesday the 27th, it's on sale for $79 with a 2-year agreement plus  they will include a Tool Kit with Extra Blade and a 2-pack of Mats. Can you believe it? This is a great opportunity to get your machine. That's over $50 of savings! And what's more, no Craft Room payments for 30 days. It's their best deal ever.

To get this amazing Black Friday Special click here HERE and Use Coupon Code 766E4A 

If you are Outside of the US or you are not interested in a subscription plan, you can purchase an Inspiration through  HERE  at retail price, and they will take $100 off the price with Coupon Code 766E4A  and also include the Tool Kit and Mats! 
Sorry offer not Valid in UK,AU,ZA.

If you have any question, let me know. Thanks

Get the Pazzles Inspiration, the most comprehensive electronic die cutter available, for as little as 99 dollars down.
If you like to learn more about the Pazzles Inspiration Creative Cutter machine click HERE , also if you want more information about the benefits of joining the Pazzles Craft Room just click HERE.


Sunday, November 11, 2012

My husband's 50th Birthday (Part 2)

Hello my friends. November is here and this year is almost over. I can't wait to start decorating my house. I'm a little behind with the Christmas cards but I hope to catch up later. Today it's the second part of my husband's 50th Birthday. As I told you before I wanted it to be special for him. I organized a surprise birthday party. It was difficult to make the preparations since I have to hide everything every time he got home from work, but I managed to keep it as a surprise for him.
First I made the party invitation cards. His surprise party was a 70s B-day theme. I couldn't find any paper for making the invitation so I designed the paper myself using My Memories Suite Program


I love this program. You can design any paper you want and any color your want. You only need a regular printer and you are ready to go. You don't need to spend hundreds of dollar on an expensive program to design your project. This is a simple program and so easy to use. If you are interested just click HERE and don't forget to use my code: STMMMS29935 and you will get $10 off the software (reduced price of only $29.95), plus you get a coupon for $10 for the My Memories online store. It is really fun! Go check it out.

I cut the Disco People using my Pazzles Inspiration Cutter Machine. This machine is amazing. I couldn't find any cut file related to Disco or 70s so I just downloaded this clip art from the Internet and cut it with my Pazzles. You can also make the shadow of any picture as well. I also used my Cricut Machine for the "You're Invited" sentiment. I purchase the Holographic Glitter Silver paper at Hobby Lobby. I like it because it's self-adhesive and also it's similar to a disco ball. Perfect for a 70s look.

Stay tune for part 3 (pictures of the party decoration coming soon)


If you have any question, let me know. Thanks

Get the Pazzles Inspiration, the most comprehensive electronic die cutter available, for as little as 99 dollars down.
 
If you like to learn more about the Pazzles Inspiration Creative Cutter machine click HERE , also if you want more information about the benefits of joining the Pazzles Craft Room just click HERE.


Tuesday, October 23, 2012

Halloween Wreath


Happy Tuesday everyone!!!  It's almost Halloween and today I want to share a wreath I made out of felt. I really had a lot of fun making this wreath, it's very easy to make. I used purple, orange and black felt. I cut the pieces by hand. You can do any shape you want, fold them twice and pin it to the wreath base, then open them and arrange them like flower. The bats are made with felt. I just cut a triangle shape with scalloped edges and then sewed them in the middle. I will probably make a tutorial later if you want. Also for some reason I couldn't get good picture of the beautiful purple on the wreath but here is the picture.


 I also made the "Happy Halloween" title using my Pazzles Inspiration Cutter machine . I totally love my Pazzles, you can make any title you want with any font and also make the outline or shadow for them. Isn't that amazing!!!!! I downloaded the font from dafont.com I can download any font I want and cut it with my Pazzles.


I hope you have enjoyed this project. If you have any question, let me know. Thanks
 
Get the Pazzles Inspiration, the most comprehensive electronic die cutter available, for as little as 99 dollars down.
If you like to learn more about the Pazzles Inspiration Creative Cutter machine click HERE , also if you want more information about the benefits of joining the Pazzles Craft Room just click HERE.

Thursday, September 27, 2012

My Husband's 50th Birthday (Part 1)

Happy Fall everyone. It's finally fall and I love it. This month is very special because it's my husband's Birthday and this year he is turning the Big 50 so I wanted his birthday to be very special for him. The day of his birthday I wanted to surprise him and I decorated the table hanging some rosettes from the ceiling. I used Ribbon & Rossettes Cricut cartridge. I made them very big. I used Sentimental Cricut cartridge for the scalloped circles, Smiley Cards Cricut cartridge for Ha-p-B-Day, Life's a Party Cricut Cartridge for the 50 tag and cake and I also used Mickey font for the name Jerry. I welded the letters using my Gypsy.


I also made a Birthday Card using my Cricut Imagine. It was the fastest card ever. I made it in 15 min. I used Imagine More Card Cricut Imagine Cartridge.


This is my husband with his present. He liked the decoration.


My husband opening his present. He loves Fish tanks.


Very happy with his present.


And finally cutting the cake. I made his favorite pinapple upside down cake. Here is a the tip, if you don't have a candle with a number, just cut the number in cardstock, attach a toothpick in the back with hot glue and then use a regular candle. I cut the 50 number using Life's a party cricut cartridge  He had no clue that I was secretly planning a Surprise Party for him later that weekend (Part 2 coming soon). I hope you all enjoy it. If you have any question let me know.

Monday, September 3, 2012

Pinwheel Center Piece Gift

Happy Labor day everyone. I hope everybody is having a wonderful day. I can't wait for the summer to be over, It's so hot and I really want the weather to cool down a little bit. Today's project is a Pinwheel Center Piece gift I made for a friend's Birthday. I have seen these lollipop center piece before and I thought it was perfect for a Gift Card holder. But in this case I added some pinwheels to give it a more festive look.


First I printed the paper in my Cricut Imagine machine. Using the Cricut Imagine Hopscotch Cartridge I printed and cut a 8x8 square then a flipped the square over in the same spot and printed only the other side with a coordinated color. Now it's ready to cut. I decided to cut the pinwheel in my cricut expression but you can also cut it in the Cricut Imagine if you want.


If you don't have a cricut imagine, you can print any pattern paper in your regular printer. I used a wonderful software called My Memories Suite. This is a great program when you can design you own scrapbooking pages and it's easy to use. In this case I wanted a pattern paper to coordinate with my design and I didn't have any so this program has hundreds of different papers that you can use not only for digital scrapbooking but also for many projects like this one. Isn't that fabulous!!!! As you can see in the picture I printed an 8x8 square with a stripe pattern from the software. If you are interested just click HERE and don't forget to use my code: STMMMS29935  and you will get $10 off the software (reduced price of only $29.95), plus you get a coupon for $10 for the MyMemories online store. You can also make scrapbooks you can print at home or turn them into professionally printed books! It is really fun! Go check it out.


For the cut I used Teresa Collin Baby Boutique Cricut Imagine Cartridge. I love Teresa Collins designs, she is one of my favorite designers. I cut the pinwheel seven inches and put it together. Then I attached a wooden stick with hot glue and then cut a circle with a punch using the remaining paper and glued it down to hide the brad. In this case the pinwheels are for decoration and they won't spin.


Finally attached the gift card with hot glue. This is a Target Gift card which I thought it was perfect for my project because it's very colorful. I hope you have enjoyed this project and if you have any question, let me know.


Tuesday, July 31, 2012

Diaper cake

Hello everyone. It's the end of the month already and Summer vacation is going fast. I can't wait for Fall season and cool down a little bit. Today I have a Baby Shower Diaper cake I made for a very good friend two years ago. She has a beautiful daughter and I was very happy to help her with the Baby Shower Preparations. As you can see, this diaper is very simple. I just add three tiaras of rolled diapers, and gathered them together with a pink and yellow ribbon. The flowers and butterflies cuts are from New Arrival Cricut Cartridges. Hope you all have a great weekend.


Monday, July 9, 2012

3D Halloween Cones Decor

Hello everyone. It has been a raining day today and difficult to take pics but I want to share a Halloween project I made for the 3D Cones Challenge over the Cricut Craftroom Blog  Provo Craft is giving this 3D Cones digital cut file free for a week and I thought it was perfect for a holiday decor. For this project I used the following Cricut Carts: 3D cone digital cut file, TC Chic & Scary, Paper Trimming, October 31st., Wild Cart, Holiday Cakes and of course Happy Hauntings (one of my favorite carts).


This time I took a second pic with less spider web.


This is the box. I cut some spider webs to decorate the holes. I applied black glitter to them.


 I tried to do all the cones different. This is the first cone. I used recollection Specialty Trim to decorate the sides, I attached it with a purple brad. I wrapped some black tule around it.


This is cone # 2 . I wanted to keep it simple so I just decorated the edges with more trim.


 The last cone I just put some stickles on the edges and wrapped another trim up.


I hope you all enjoy this project. If you have any question, let me know.

Wednesday, July 4, 2012

Happy 4th of July

Happy Independence Day!!! Today is America's Birthday and I am so thankful for living in this wonderful country. Are you planning any barbecue today? I am going to see the fireworks, I feel like a little girl everytime my DH takes me to see the fireworks, I love them. I want to share a project a saw on Pinterest and I decided to make one for my porch. This wreath was orginal made by Capital B and she kindly made a tutorial for us. I followed her instructions and I think mine came out pretty good. Of course hers is more beautiful. Next time I'm going to make it different, I would recommend to cut the squares bigger or use a smaller wreath. I use Stand and Salute Cricut cartridge to cut the stars. Hope you all have a wonderful 4th of July.


Tuesday, June 19, 2012

Pretty in Pink

Hello friends. My B-day was last week and I had a blast in San Antonio with my DH. I love going to SeaWorld and the new water park is spectacular. I want to show you a project a made for a friend. This is another $1 wooden frame from Michaels. For this project I used DCWV paper. French Manor and Home decor cricut cartridge. The pink flower on the front was handmade using the rolled paper flower technique. I also used flat pearls, stickles and diamon dust. Sorry about the mess in my desk. That is the aftermath lololo.

Have a wonderful summer!!!

Saturday, June 2, 2012

Altered Clock for my Craft Room

Hello my friends. I hope everybody is having a wonderful weekend. It's June already and I love it because my B-day is coming soon. I am still working on my blog design. I really want to change this blog layout and have my own design but it's a lot of work. Today I want to share a project a made for my Craft room. I'm very excited that everything in my Craft room is coming together. I hope you all like it.

I found this clock in the IKEA clearance section for $2 Can you believe it!!!  It was a bargain.


But it has an industrial look so I decided to alter it. For this project I used my Cricut Imagine. I love my Cricut Imagine, it prints and cuts and I can use any cricut cartridge on it. I used Ribbons & Rosettes Cart, Art Philosophy Cart, Cricut Imagine carts used Better Togeher, Lori's garden and Imagine More Cards. Of course I have to add some bling bling.


If you have any question, let me know.


Friday, May 18, 2012

Zumba signs

Hello everyone. It's very warm here and I can't wait to enjoy the weekend. I wanted to show you some pics of the signs I was making for my cousin last INSD. It was a Zumbathon benefiting St. Jude Children hospital. I used my Pazzles Inspiration Creative Cutter  to cut the Zumba word and the logo. I really love my Pazzle, you can cut all the imagines you want with no limits. If you have questions about the Pazzle machine, just let me know. You can also find more information by clicking on the Pazzles banner on the left.


I also used my cricut to cut the circle.


And this is my DH holding the sign for me. Love you babe!!!


Saturday, May 5, 2012

Cupcake Invitations

I can't believe is already May. Wow!!! Time goes fast. Today was InterNational Scrapbook Day and I was really busy making some signs for my cousin.  A fun way to spend INSD using my cutter machines. I will post pics when I finish them. I am still trying to redesign my blog so I apologize for the delay on posting new projects. Tonight I want to share a Cupcake invitation card I made for my cousin's daughter. It was a Cupcake party and I really love the way they turned out.


I used my Gypsy to weld the cupcake image from the Doodlecharm cartridge and the sentiment is from Paper lace Cartridge. I love the colors in this card. I also used D'vine Swirls and Polka Dots Cuttlebug folder as well as some Diamond stickles. This is the card open ready for the invitation information. Have a nice Sunday everybody.


Monday, April 23, 2012

Communion Card

Hi everyone. Sorry I have been MIA for a while. I'm trying to redesign my blog and it has been a long learning process. I hope to have a new design on my blog by next month.
May is coming soon. Can you believe that? School vacations are coming around the corner and it's the time of the year when I get to work with baptism and communion invitations. Today I want to share a communion card I made for my cousin's daughter. I love the simplicity of this card, the white tones are perfect for communions or baptisms. I used Elegant Edges Cricut Cartridge and Birds and Swirls Cuttlebug folder. I also used Crystal stikles and white flat pearl. The ribbon is from Celebrate it Sheer creations from Michaels. If you have any question let me know. Have a great weekend.

Sunday, April 15, 2012

Wedding Favors

Hello everyone. It is a gorgeous day and the perfect day to going out. Spring is the time of the year when many many couples tie the knot, so today and going to share some simple but elegant Wedding Favors I made for a friend. Have a Happy Sunday.


The first Wedding favor was made with Tie the Knot Cricut Cartridge, this is a perfect cartridge if you are planning a wedding. I also embossed the edges using Frills Cuttlebug folder and added some golden flat pearls. I printed the tags with my computer and cut them with a circle punch.


This is a detail of the top. I embossed two of the heart shape for contrast. I used D'vine Swirls Cuttlebug folder. This is one of my favorite folders. I wanted to emboss all the box but unfortunately the cuttlebug is not big enough for the box. But I think it came out pretty.


This is the second box. I love the simplicity of the white color in this box. I used my Gypsy for this one. It was made with CTMH Art Philosophy Cricut Cartridge (love this cartridge) and Martha Stewart Elegant Cake Art (very elegant cartridge). I was emboosed with Victoria Cuttlebug folder. I made two boxes for my friend to choose from. Which one is your favorite?

Tuesday, April 10, 2012

My Craft Room Curtains

Hi. I'm so excited to show you my craft room curtains. I made them myself and I am so glad they came out the way I like it. I spent more than two months looking for the perfect fabric and trim until I finally found them. This fabric has all the colors I like for my craft room, green, black and pink. Now I need to start doing the rest of the curtains for my house. I hope you all had a nice Easter holiday.


It is very difficult to take pictures of the whole curtains since my craft room is small. The pictures were taken at night but I hope you like it.


This is the trim my Cricut Circle friends helped me to decide. Thank you very much girls.

Thursday, April 5, 2012

Cricut Circle Project

Hello everyone. I want to post a project I made back in 2010 when the Cricut Circle Started. I made this project using only the French Manor Cartridge. One of my followesr "TiaD" told me that she just got this cart so I thought to share this project with her and everyone. This is a 12in x 16in canvas (I love working with canvas). I used DCWV paper and recollection paper in black and pink color.


I painted the border black and added a border from the French Manor cart as well.


I wanted the canvas to look very glamorous so I added some pearls, Recollection flowers and a flower lace decorated with my I-rock crystals. This black and white picture of my DH and me is perfect for my canvas, don't you think?